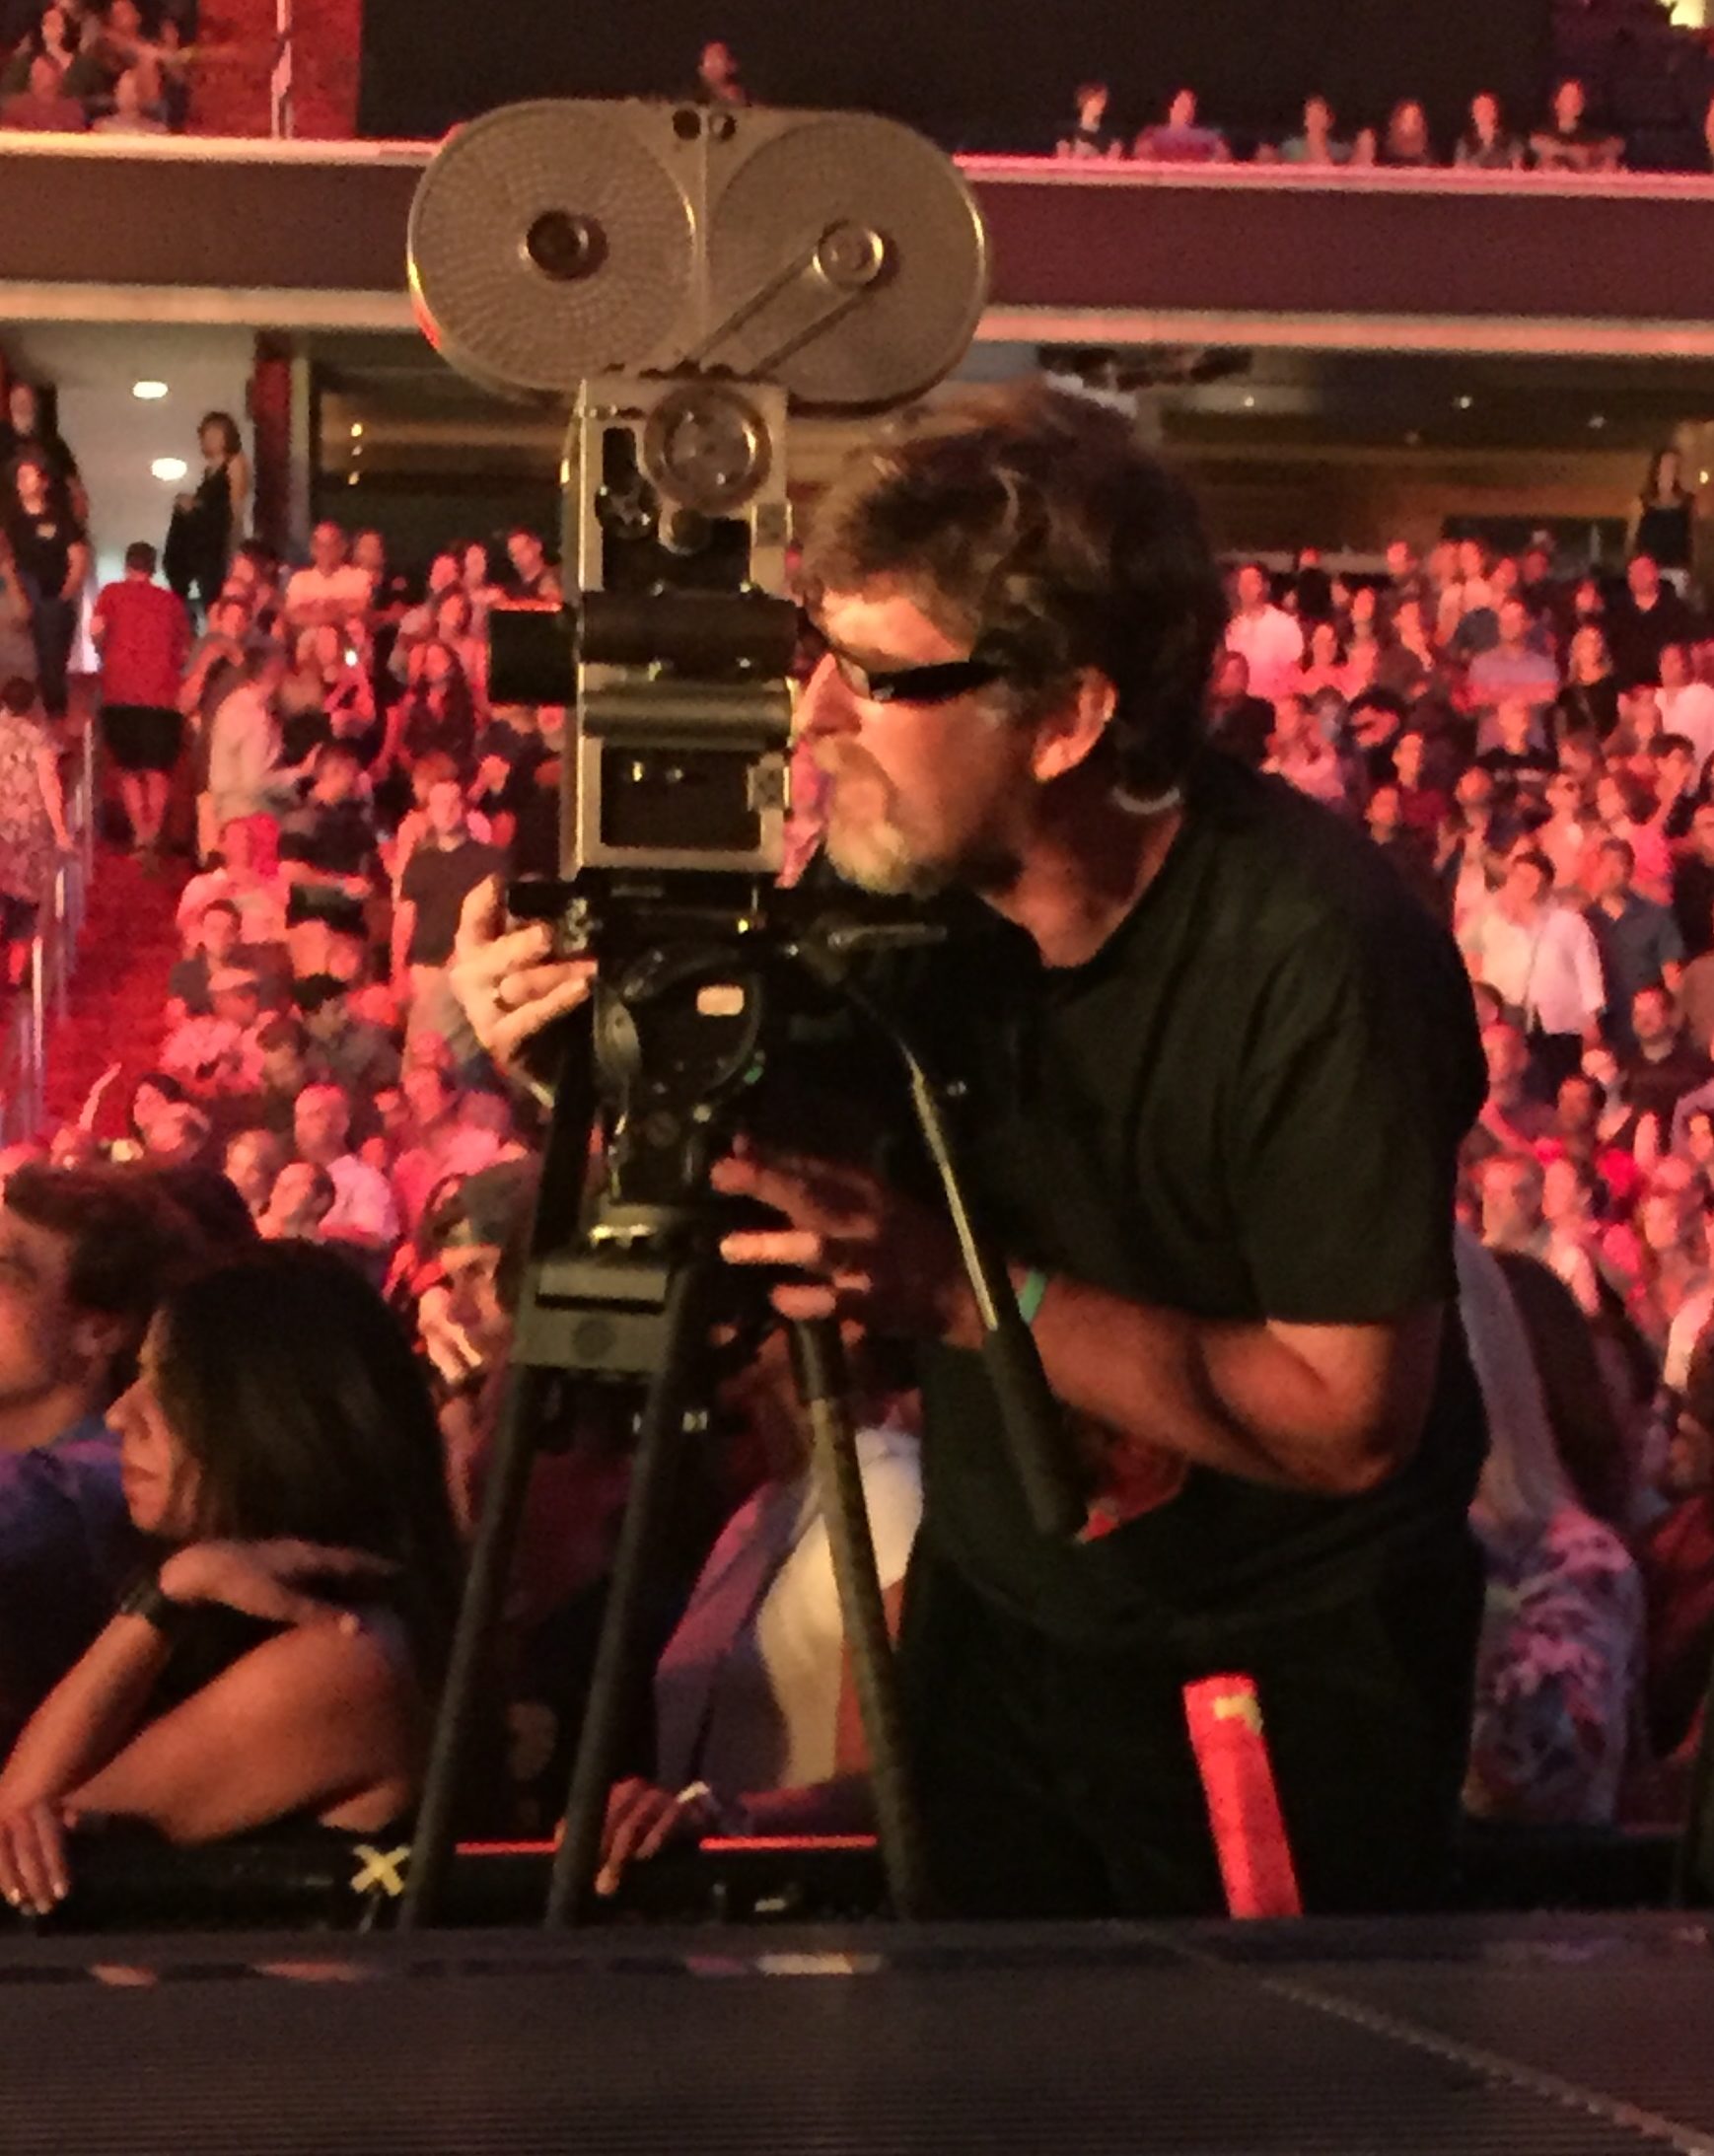
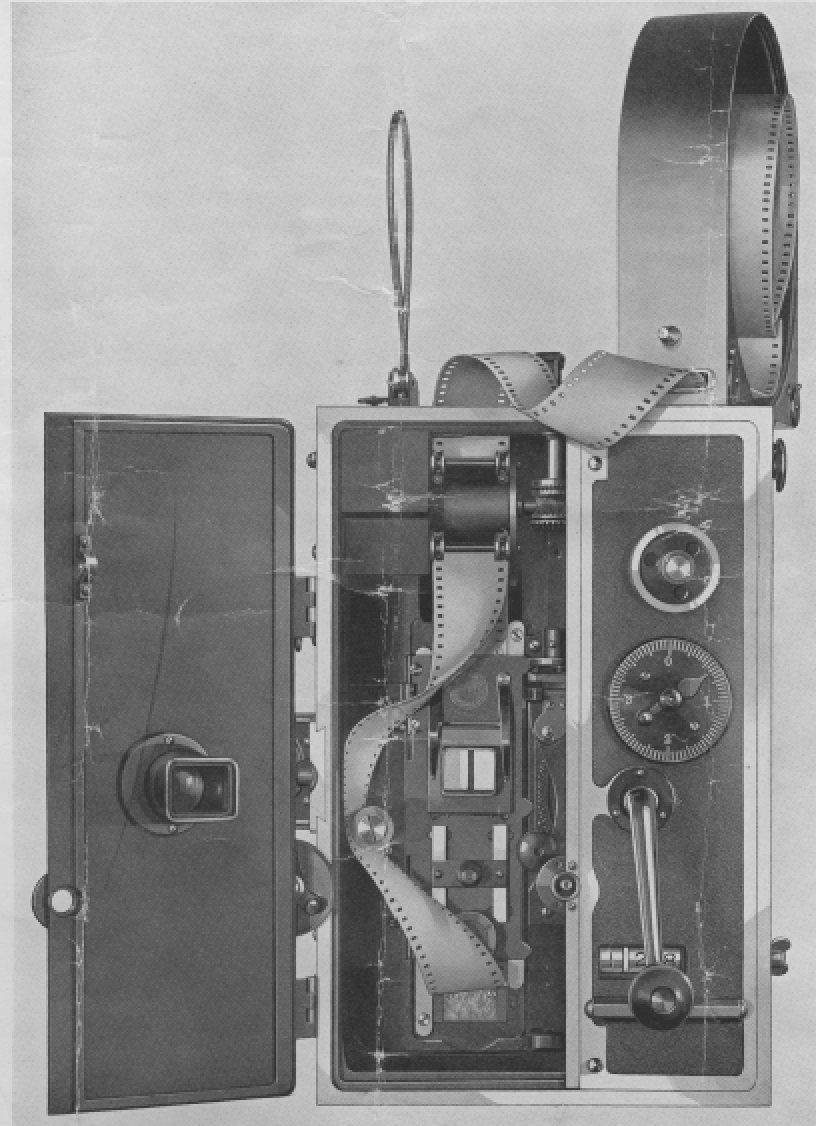
I have had a Wilart 35mm hand crank camera for a few years now, given to me from the former dean of the film school (thanks Glen!) where I learned to make my way in this business. It even came with a manual of sorts. But as was the practice in those days, it was more like a sales catalogue, telling you how wonderful it was without actually going through details of actual operation. I muddled through and managed to get it loaded with only a single picture of it threaded to go on, and ran some film through it to prove it still worked, and had no light leaks. I would then occasionally practice, and do some research on the camera and also trot it out once a semester for students of my own to show them a 90 year old camera can still produce decent images, which is more than anyone will say for 90 year old digital cameras. (Once they reach that age!)
Anyway, I thought I had learned the basics of it’s operation and loading, and had even made some improvements, like making some 3D printed adapters that allowed modern cores to be loaded on the older style spindles. I thought I more or less had it down. Then I had an actual job come up where they wanted a hand crank camera in the mix. Great! Finally get to use it for real, as it were. But like many production jobs it came up suddenly, I had to travel back in town for it, and we essentially were relying on whatever short ends I had in the fridge as it was too short notice to get a few fresh loads from Kodak.
Well, let me tell you, it is a far different condition to load such a camera in a well lit space with no pressure versus in a live concert environment, where it is dark, and loud, and you have time sensitive material to shoot, with no re-takes and all you have are short ends and precious few mags to put those short ends in.
All in all it went well, at least when it absolutely had to, although at non-critical moments I had some jams, and other issues, but no show stopper problems. Anyway, I thought, if I want this to happen again, I should formalize some notes to myself how to load the damn thing for the next time, so I can move faster. Then I thought perhaps I could also share it, because, you never know, it could be useful to someone else, or at least interesting.
But first, some Cinema History, and where the Wilart fits in it:
(note: this is by no means a comprehensive list of hand crank cameras and events during this era, just the ones I find most interesting)
1889: George Eastman invents flexible celluloid film, as opposed to glass plates, paving the way for the development of motion picture cameras.
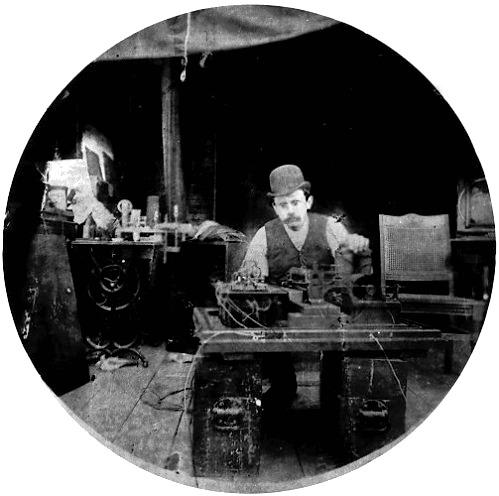
Charles Kayser of the Thomas Edison laboratory with an early version of the Kinetograph. (Photo from National Park Service/Wikipedia)
1892: Edison’s Kinetograph. Around 1892 Thomas Edison invents the Kinetograph, a camera created to make content for his “peephole” viewing device called the Kinetoscope. both devices used “4 perf” or four perforations per image, on both sides of the image area, and with a few minor tweaks regarding sprocket hole shape, is essentially the standard gauge and sprocket placement we use today. But Edison didn’t get everything right. His camera was driven by DC power (another of Edison’s inventions) and as such was more stationary than later cameras. He even built a studio for it called “The Black Maria” which was a structure with blackout walls and window and roof bits that could open to let light in. The whole thing was on a turntable so he could position it in best position based on the sun’s position. As such, anything that was to be filmed had to come to Edison. And when done, the footage was put in a Kinetoscope, and was only viewable by one person at a time.
![By Albert Tissandier - Originally published as an illustration to "Le Kinétoscope d'Edison" by Gaston Tissandier in La Nature: Revue des sciences et de leurs applications aux arts et à l'industrie, October 1894: Vingt-deuxième année, deuxième semestre : n. 1096 à 1121, pp. 325–326. Republished with "Mechanism of the Kineto-Phonograph" by Arthur E. Bostwick (Science editor) in The Literary Digest. v.X No.4 (24 November 1894), p. 15 (105). Image file uploaded from [1]., Public Domain, https://commons.wikimedia.org/w/index.php?curid=602117](http://nateclapp.com/wp-content/uploads/2018/08/Kinetoscope.jpg)
Illustration of Kinetoscope, circa 1894. Note there is a viewport on top for only one person at a time. (Originally published as an illustration to “Le Kinétoscope d’Edison” by Gaston Tissandier in La Nature: Revue des sciences et de leurs applications aux arts et à l’industrie, October 1894)
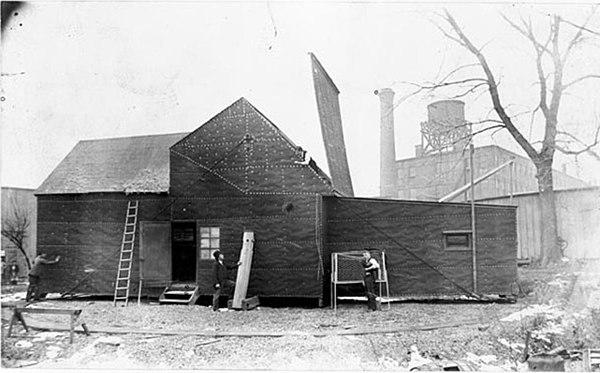
Edison’s studio the “Black Maria” (note the curved bit in the ground, that was the turntable to turn the whole building to match the sun’s location.
1895: Lumière Cinematographe. About the same time Edison was doing this, The Lumière brothers were working on their own camera,the “Cinematographe.” They patented it in 1895. Theirs also used 35mm but only one perf per image area, (that is, one on each side), and the perfs were rounded. There is a small possibility that despite the different sprocket placement, it might work with modern film stocks, but just be a bit chattery and uncooperative, as the holes were a different shape, but they appear to be approximately same place relative to the width of the film.
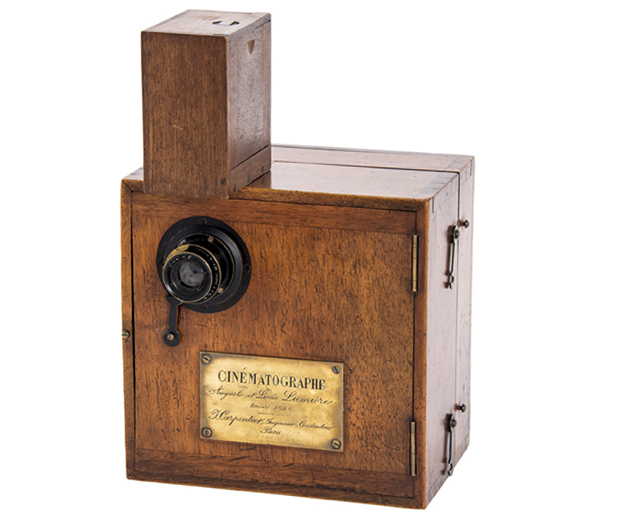
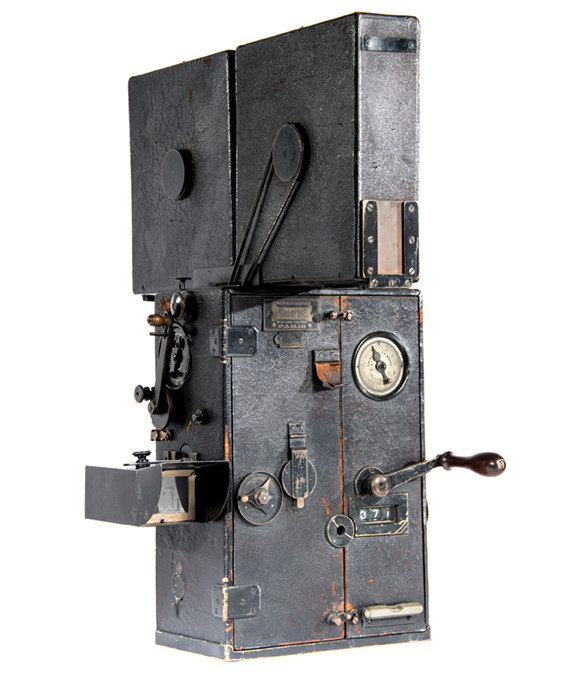
Front view of the Lumière Cinematographe Note small 60′ feed mag on top.(photographed by Richard Edlund, ASC and collaborator Dave Inglish, ASC collection)
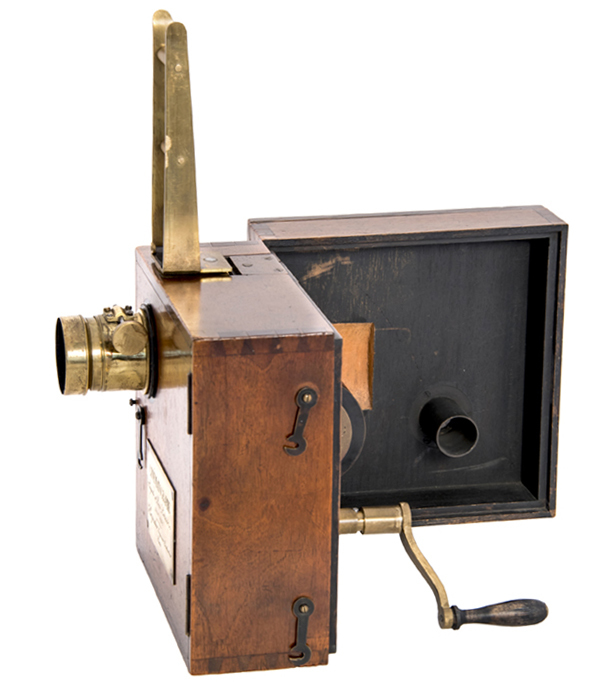
the side view of the Lumière Cinematographe Note the brass top part used for holding already developed film for projecting. (photographed by Richard Edlund, ASC and collaborator Dave Inglish, ASC collection)
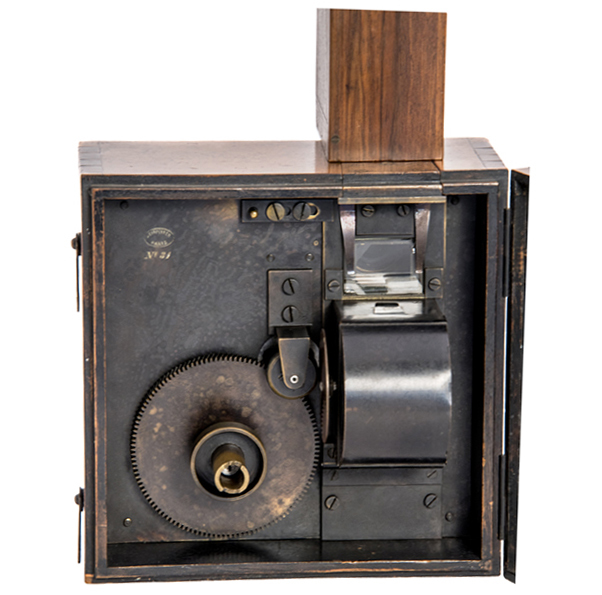
back of the Cinematographe. (photographed by Richard Edlund, ASC and collaborator Dave Inglish, ASC collection)
Nevertheless, the Lumière brothers made several important contributions. Their little Cinematographe (essentially a wooden box with a lens and a crank) could shoot about 50-60′ of film, and was un-tethered to the requirements of DC power, as it was hand cranked. Additionally, after the film was developed, the camera could then load the developed film and unexposed negative together and make a contact positive print. Develop that and you had a print you could show audiences. And coincidentally, get a big light source and shine it into the back of the little camera and viola! it was now a projector! Suddenly, instead of only one person viewing at a time, as in Edison’s Kinetoscope, hang a sheet up in a venue and everyone in the room could view it. (Discounts were given for those who had to view the image through the sheet as opposed to on it due to their less than ideal seats in the venue.) Now rather than bringing the subjects to the camera, as Edison did, the camera came to the subjects. Lumière cinematographers could come into town, film local events and screen it the same day in the evening at a local venue.
Despite it’s versatility, the Cinematographe was a pretty simple camera. It had no viewfinder. It was a wooden box with removable doors front and back and a smaller wooden box that sat on top that served at the feed magazine. The crank was in the back. Take-up occurred inside the camera body. Max load was about 60′. The only way to frame something was to open up the back and either with a ground glass placed in the image plane, or by using the film itself, a dim, upside down and backwards image could be seen. Focus using that, then close up the camera, and crank away, hopefully without shaking the camera too much or being uneven in your speed. under these conditions, no panning was going to happen, as the operator would be just guessing what he was pointed at.
1902: Pathé Professionelle. While this was going on, four French brothers, (Charles, Émile, Théophile and Jacques) tried to get in on the action. Charles Pathé had seen the Kinetoscope, and presumably the Lumière’s work, and got patent rights for Eastman Kodak stock in Europe. by December 1897, Société Pathé Frères was formed, and they got heavily into production, lab work, and distribution of film. Initially they used cameras derived from Lumière patents.
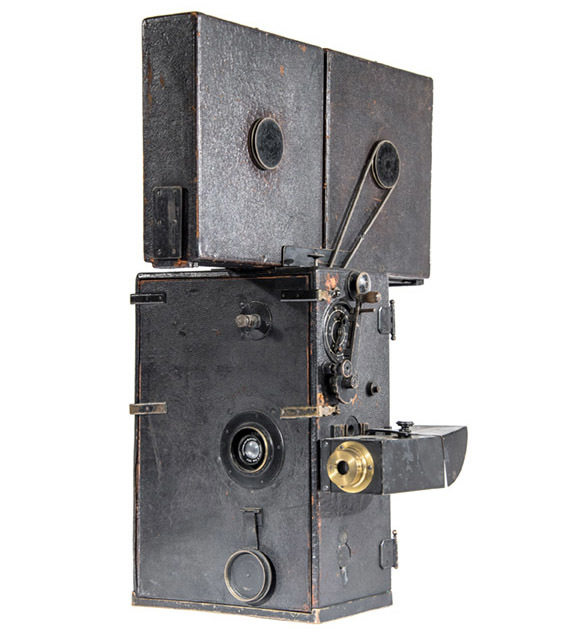
Pathé Professionelle ((photographed by Richard Edlund, ASC and collaborator Dave Inglish, ASC collection)
Pathé obtained the the rights to the Lumière patents and set about designing their own “studio” camera, expanding upon those patented designs. by 1903 they had the “Pathé Studio” or “Pathé Professionnelle” camera. (some data indicate 1907-1908, but this seems late)
by the 1910’s All major Hollywood studios were using Pathé Professional cameras. They improved upon the Cinematographe design by having lots of extra features. They had 400′ capacity magazines, an actual viewfinder, albeit parallax viewing, a footage counter, a focus adjustment knob in back as well as an iris control knob. Later models had a fade up & fade down capability using that adjustable shutter. (Film lab work was not that sophisticated, and the more effects you could do in the camera the better.) They even had a single frame capability. In addition to the parallax viewer, there was a peephole that was light tight to the film gate, and you could look through that between takes to precisely frame up your subject, using the film stock as a ground glass. It was dark, and upside down and backwards, but it would show you what exactly what the camera was seeing, including focus. (Unfortunately if you tried this with modern color stock, it will not work, as the anti-halation back makes the stock base too dense to see through.)
That said, the camera was not without its problems. Despite all these improvements, most cameras only came with a 50mm lens, and the external focus knob was calibrated to that alone. The body was made of leather covered wood, as were the magazines. The non-conductive properties of wood combined with the fast moving celluloid nitrate film in dry environments could cause static discharges that would silently ruin takes, only to be discovered later when it was developed. As this was a new industry, professionals formed informal groups to share information, troubleshoot and tell stories. In California, that group was called the “Static Club,” presumably after their most vexing problem. It is worth noting that in 1919 the “Static Club” (based in LA) joined with “The Cinema Camera Club” (In NY, formed by Edison) to form the American Society of Cinematographers (ASC) which is still very much active today.
One working solution to prevent static was to put a damp sponge inside the camera body to help alleviate the static buildup. Perhaps due to the Pathé Professional’s heavy use in the 1910’s or the fact that wet sponges were being put in the wooden cabinets that were the camera bodies, the cameras developed a reputation for always needing repair & additional light-proofing with electrical tape, presumably as the wood joinery started to come apart. It didn’t help the the body was called a “crackerbox” due to either it’s shape or lack of durability.
If you are interested in more, check out the ASC post about the camera owned by the cinemeatographer who photographed the “Perils of Pauline”: Arthur C. Miller, ASC’s Pathé donated to the ASC.
1908: Debrie Parvo. The beginning of the evolution away from the Pathé Professional as the gold standard for working cameras. André Debrie, previously a manufacturer of film perforation machines in France, finished working of the Debrie Parvo camera.
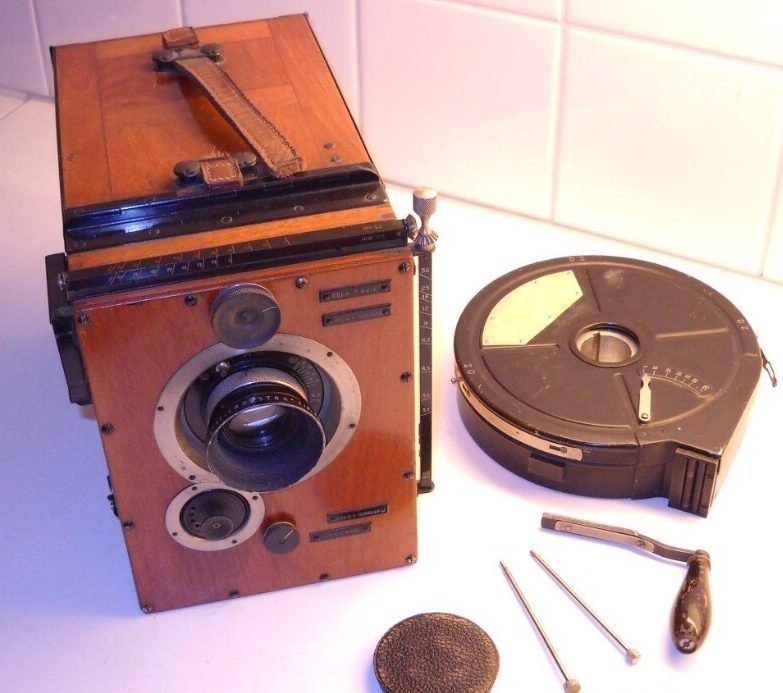
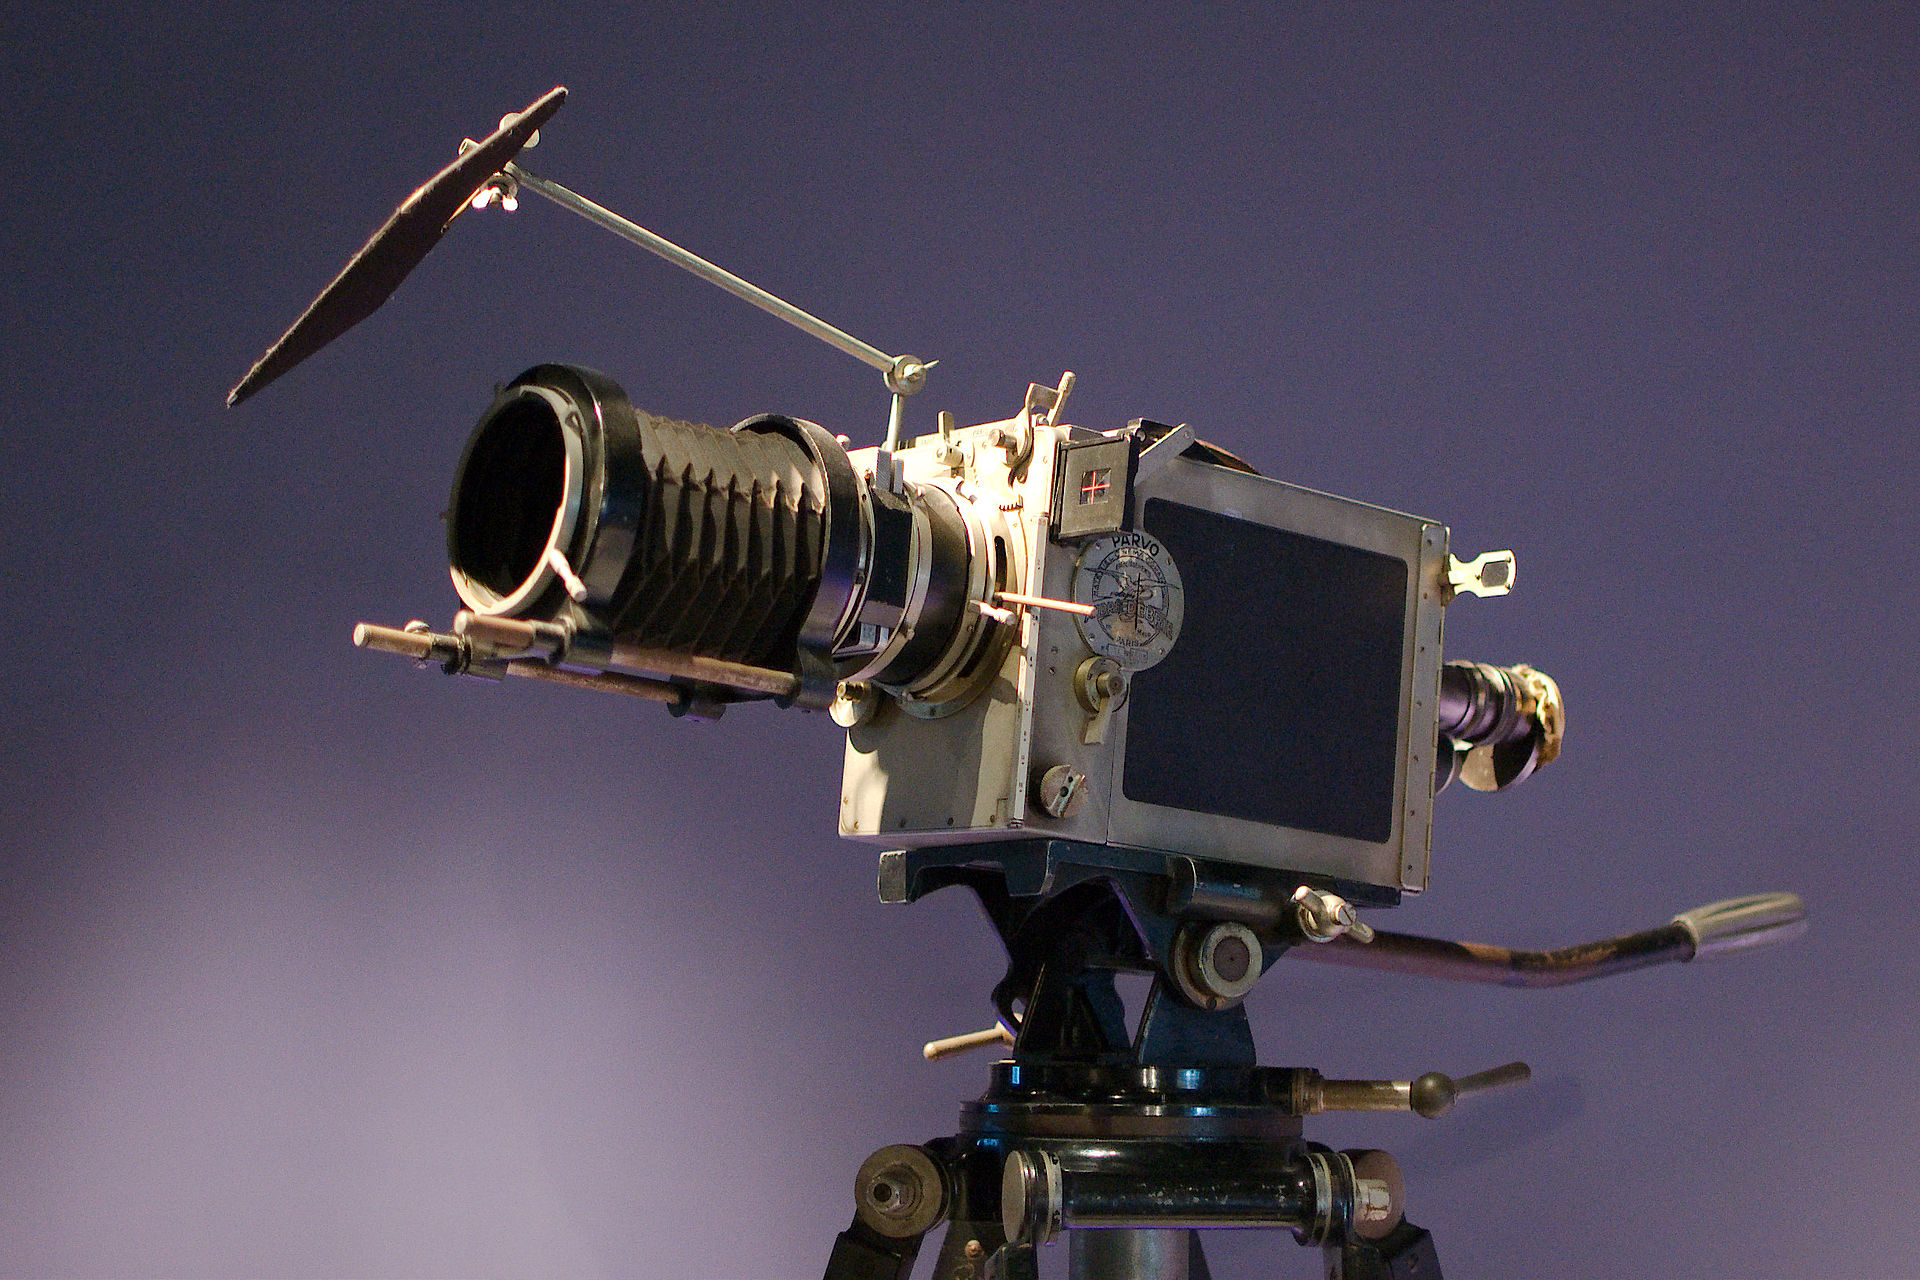
an early Debrie Parvo made of wood. Note one of the round 400′ mags that almost look like a film can.
It was his attempt to make a more portable, compact, versatile camera. The design was compact wooden box with internal 400′ metal magazines. The Parvo also had the crank mounted on the side, instead of the back. It was an improvement from the Pathé Professional, in that it was more compact and had a better viewfinder system. You could look through the viewfinder in the back, and look at the image form the lens to determine framing and critical focus. But for framing while cranking, you would have to use the side parallax finder, or have your eye pressed firmly against the very very dim image in the eyepiece. But at least showed the exact frame as it was being exposed, as you were looking through the film as it went through the camera, while rolling. of course any light leaks from the eyepiece would ruin the film. and now, modern film stocks with their remjet backing are too dense to view through via this method.
Also it was not uncommon to have a selection of wide angle and telephoto lenses for the Parvo, as focus was done “through the lens” there was not a single calibrated scale on the side dialed in for only one lens size, thus making it less cumbersome to change lenses.
There were several Parvo models over the years, and by the 1920’s they switched to metal for the body, as many other manufacturers had, and had various other improvements as well. One was an ingenious method of viewing through the taking lens by way of a sort of swing-away gate where the gate with the loaded film could be pivoted away and swing in an identical “gate” that consisted of a ground glass. This could be done without opening the camera or molesting the loaded film. This meant that, at least between takes and even when using more modern opaque film stocks, you could look through the lens to check focus and framing.
Another addition was an optional DC motor. This and other innovations kept Debrie making them well past the silent era as an excellent MOS camera.
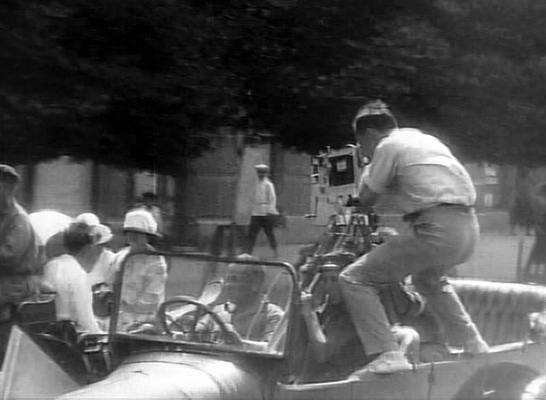
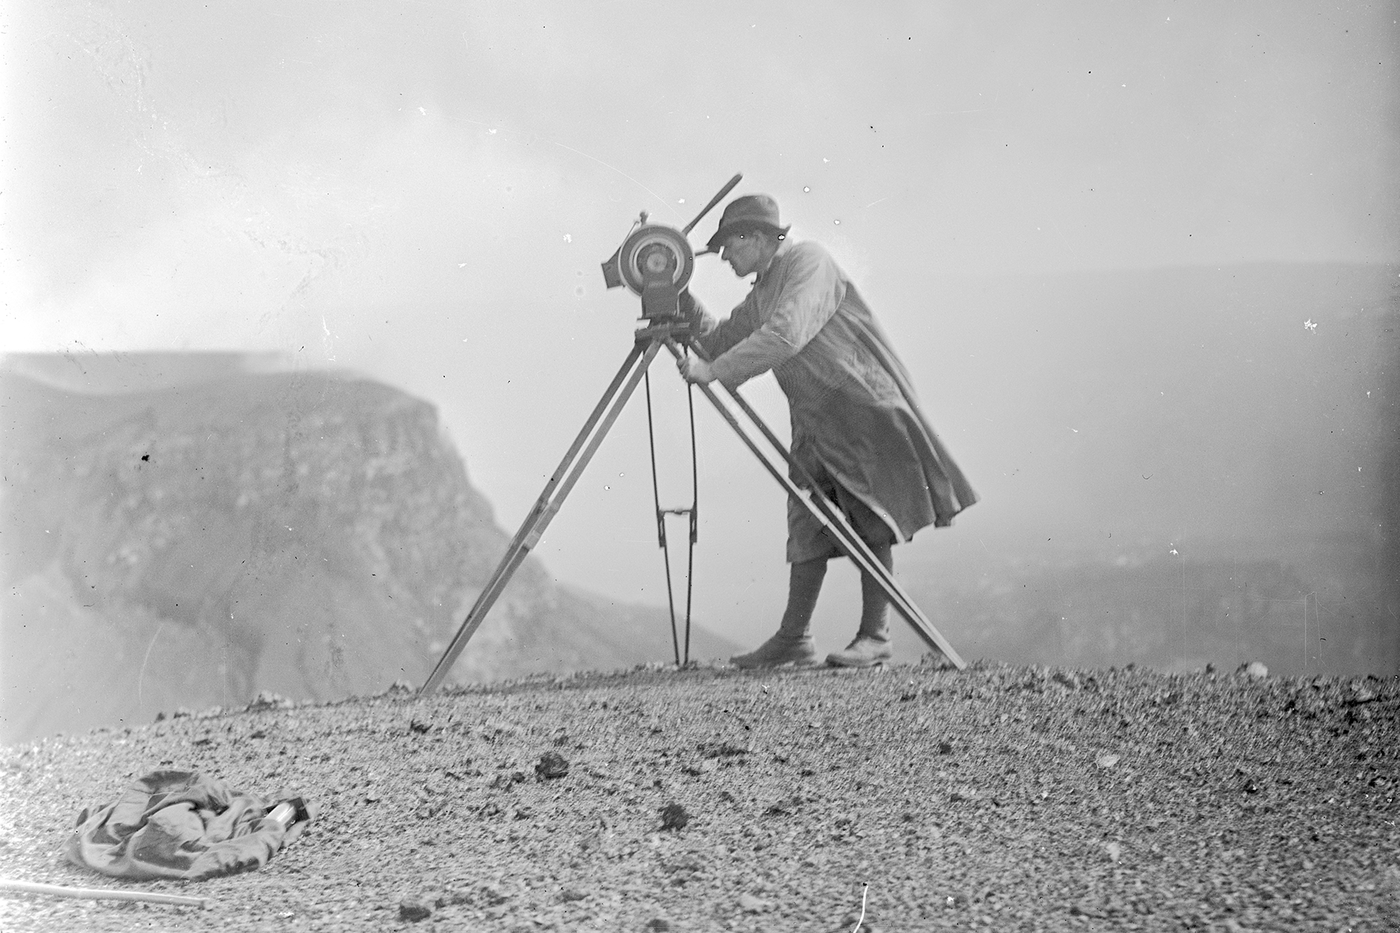
Frame from “Man With A Movie Camera” 1929 directed by Dziga Vertov. cameraman operating a Parvo camera from a precarious position, being himself filmed by another cameraman, presumably from a similar precarious position, while both are underway. Don’t try this at home.
It was the first European camera that was noticeably better than the Pathé, and as such was adopted by such filmmakers as Sergei Eisenstein, Dziga Vertov and Leni Riefensthal.
1909: A formal standard for 35mm motion picture film. Edison formalized the standard of 35mm motion picture film. He formed a trust, The Motion Picture Patents Company, which agreed in 1909 to what would become the standard: 35 mm gauge, with Edison perforations and a 1.33:1 (4:3) aspect ratio. The only difference in the Lumière standard was the perfs. It is worth noting that before this, most people bought the film un-perforated, and perforated it themselves to whatever standard they needed for their camera.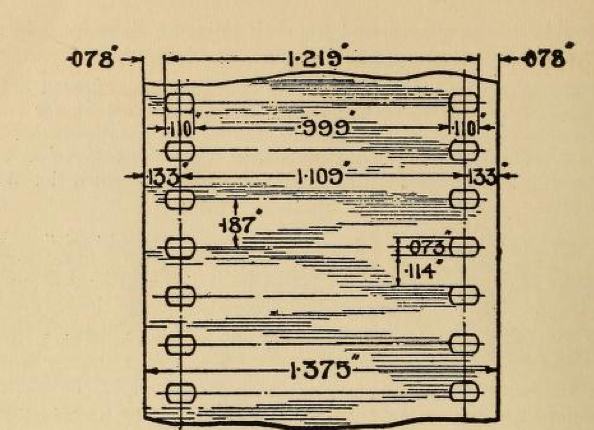
It’s worth noting that Edison, while being a prolific inventor and a businessman, was a bit of an asshole. After forming the Motion Picture Patents Trust, he felt that meant anyone using a camera with 35mm film owed him some cash. He tried various ways to enforce this on the east coast, even resorting to thugs to disrupt independent filmmakers and even smash their cameras. At least one filmmaker in Philadelphia resorted to sending out “decoy” crews to distract the thugs while the real crew worked unmolested. Rumor has it that this was one motivation for Hollywood becoming a location for film making, as Edison’s east coast goons were far far away. But that’s another story.
In the adoption of standardization,Donald Bell and Albert Howell came out the winners in the film perforation business. Bell had been a movie projectionist, and Howell was a machinist and together they initially got in the business of repairing and improving cinema equipment. They designed and manufactured much of the perforators that many, including George Eastman, used to perforate film from 1909 on.
1912: The Bell and Howell Standard Cinematograph 2709 camera. Just as the Debrie Parvo was the European improvement on the venerable Pathé, the Bell and Howell 2709 was the American answer for a better camera.
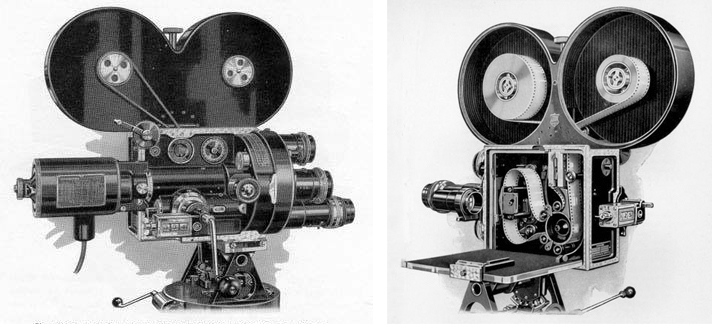
Bell and Howell 2709 camera. Note on left image both a hand crank and electric motor are installed. Also, it appears that the feed part of the mag is loaded with emulsion-out film, which is not how modern camera film stocks come. But since the feed side is freewheeling you could load emulsion-in film stock, just mounted “9” vs “p” in the mag. In both cases though the take-up is emulsion-out as it is driven by a pulley. (Also see in detailed photos from Adam Wilt on a modern production from 2012 that used a 2709 that Art Adams (acting as AC) loaded it emulsion-in no problem.) Above photo from Chicagology.
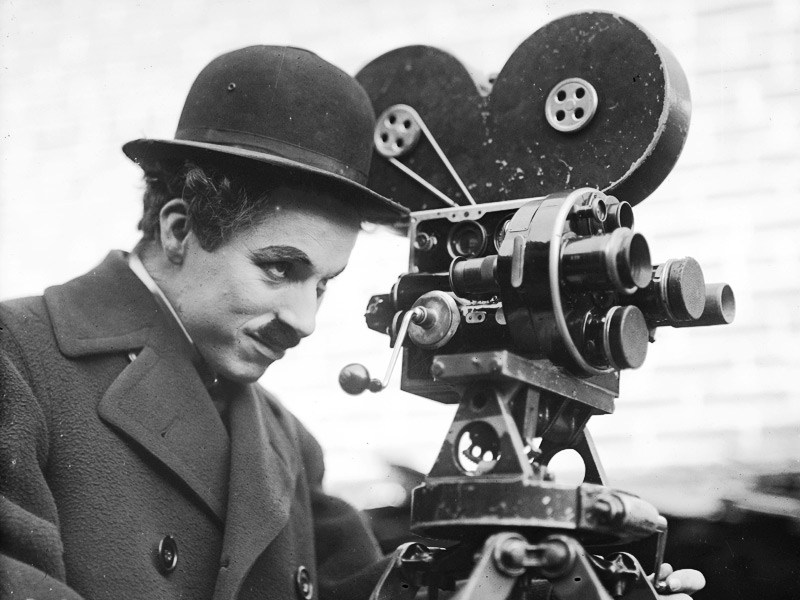
Initially Bell and Howell made cameras the way most others were made, of wood. But after one of their cameras suffered mildew and termite damage on an African safari they decide to go with a cast aluminum body. This added durability, reduced static discharge, although it added cost. This new camera also had several other vast improvements. It had a 4 lens turret, a rack-over system for better framing and focusing for those four lenses, and registration pins to better hold the film still while it was exposed. The hand crank was on the side. They named it the It the “Standard Cinematograph Type 2709.” It was vastly superior to the Pathé Professional, but it also was very expensive. it cost over four times the cost of a Pathé. Initially only movie studios could afford to buy them. It took a while for their popularity to take off, but by 1919 all major studios owned them. Even Charlie Chaplin bought one, in 1918, for about $2,000, which is about $32,000 in today’s money. To this day, when people do the “universal sign language” of movie-making by peering with one eye and making a cranking motion with their right hand by their head, or drawing a silhouette of a camera with “mickey mouse ears” magazine on top, they are mimicking a 2709.
The 2709 had an advanced movement that had registration pins as well as pull-down claws, which made for a rock steady transport of the film. But the camera was not perfect. The Bell & Howell finder still showed images upside-down. As a consequence, many replaced it by the 1920’s with a Mitchell finder that righted the image. Same went for the Bell &Howell Matte box, as well as tripods, according to Richard Edlund, ASC. Even after silent films were no more, Bell and Howell 2709’s managed to survive as MOS or title sequence cameras well into the sound era.
If you want even more info on the 2709 operation, head over to Adam Wilt’s experience working with a 2709 in 2012.
1914-1918 “The Great war” /World War I. Initially a European war, it eventually directly involved the United States in 1917. This mattered in film-making because the Pathé and Debrie were French design, and during the war, getting additional supplies from overseas was difficult, incentivizing US manufacturers to make their own models stateside.
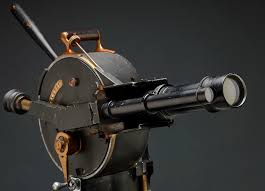
Akeley camera. Photo from ReelChicago.com
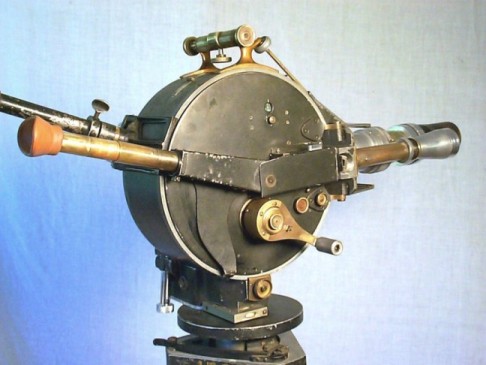
Akeley #265 from the side. from samdodge.com
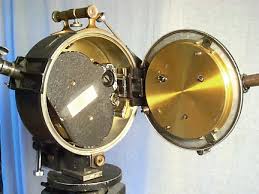
Akeley opened up. inside is a rather conventional looking 200′ magazine. photo from samdodge.com
1915 Akeley “Pancake” Motion Picture Camera: Carl Akeley was not a professional filmmaker. He was actually a taxidermist by trade. But that is kind of like saying Indiana Jones was a college professor. When Akeley felt something could be better, he more often than not he ended up revolutionizing what ever he tried to improve. Before Akeley, taxidermy mainly consisted of stuffing a skin with sawdust and sewing it up, often by people who had never seen the animal alive. This seemed foolhardy to Akeley, and in 1896 (as the Field Museum’s Chief Taxidermist) took his first of 5 safaris to Africa to collect specimens and to see the animals alive and in the wild. His work and approach revolutionized Taxidermy. In 1909, in order to better study lions, he brought a British Urban camera (Urban Bioscope/ Charles Urban Trading Co.) and although the details are sparse, it was probably a wooden box affair, and like many cameras of that era, not very easy to use. In any case, the native hunters cornered and killed the lion before Akeley could get his camera pointed, leveled, focused and framed properly. He swore he could do better and that he would design a “naturalist’s camera” that would fare better against fast moving action under difficult circumstances.
In 1911 he formed the Akeley Camera Company. by 1915 he patented the “Akeley Motion Picture Camera.”It was unlike any other camera of it’s time. The tripod head, which on every other camera was a separate part, was integral to the design of the camera body. the “pancake” round design was both the camera and the head. This meant that with a simple pan handle on the back you could drive the camera position in what was almost a nodal head. The viewfinder was articulated and, while still a parallax finder, it had matching lenses to the taking lens, it showed the image right side up, and when you adjusted the focus on the viewfinder lens, gears adjusted the taking lens focus. the viewfinder also could remain stationary while the camera was tilted, a huge improvement if you were following action. The lens pairs were very quickly interchangeable, and kits often included telephoto lenses, due to the nature of what the cameras were asked to film. He appears to have been the first one to invent the ball leveling head as well, which as any cameraman knows is essential to quickly leveling a camera in uneven terrain. (Next time you level your ball head, thank a taxidermist!) The shutter on the camera was 230 degrees rather than the standard 180, which let more light in (good in challenging lighting conditions), and the shutter itself was an innovative spinning cloth arrangement that traveled the inside of the round drum of the camera body. Like the Bell and Howell 2709, it’s body was all metal.
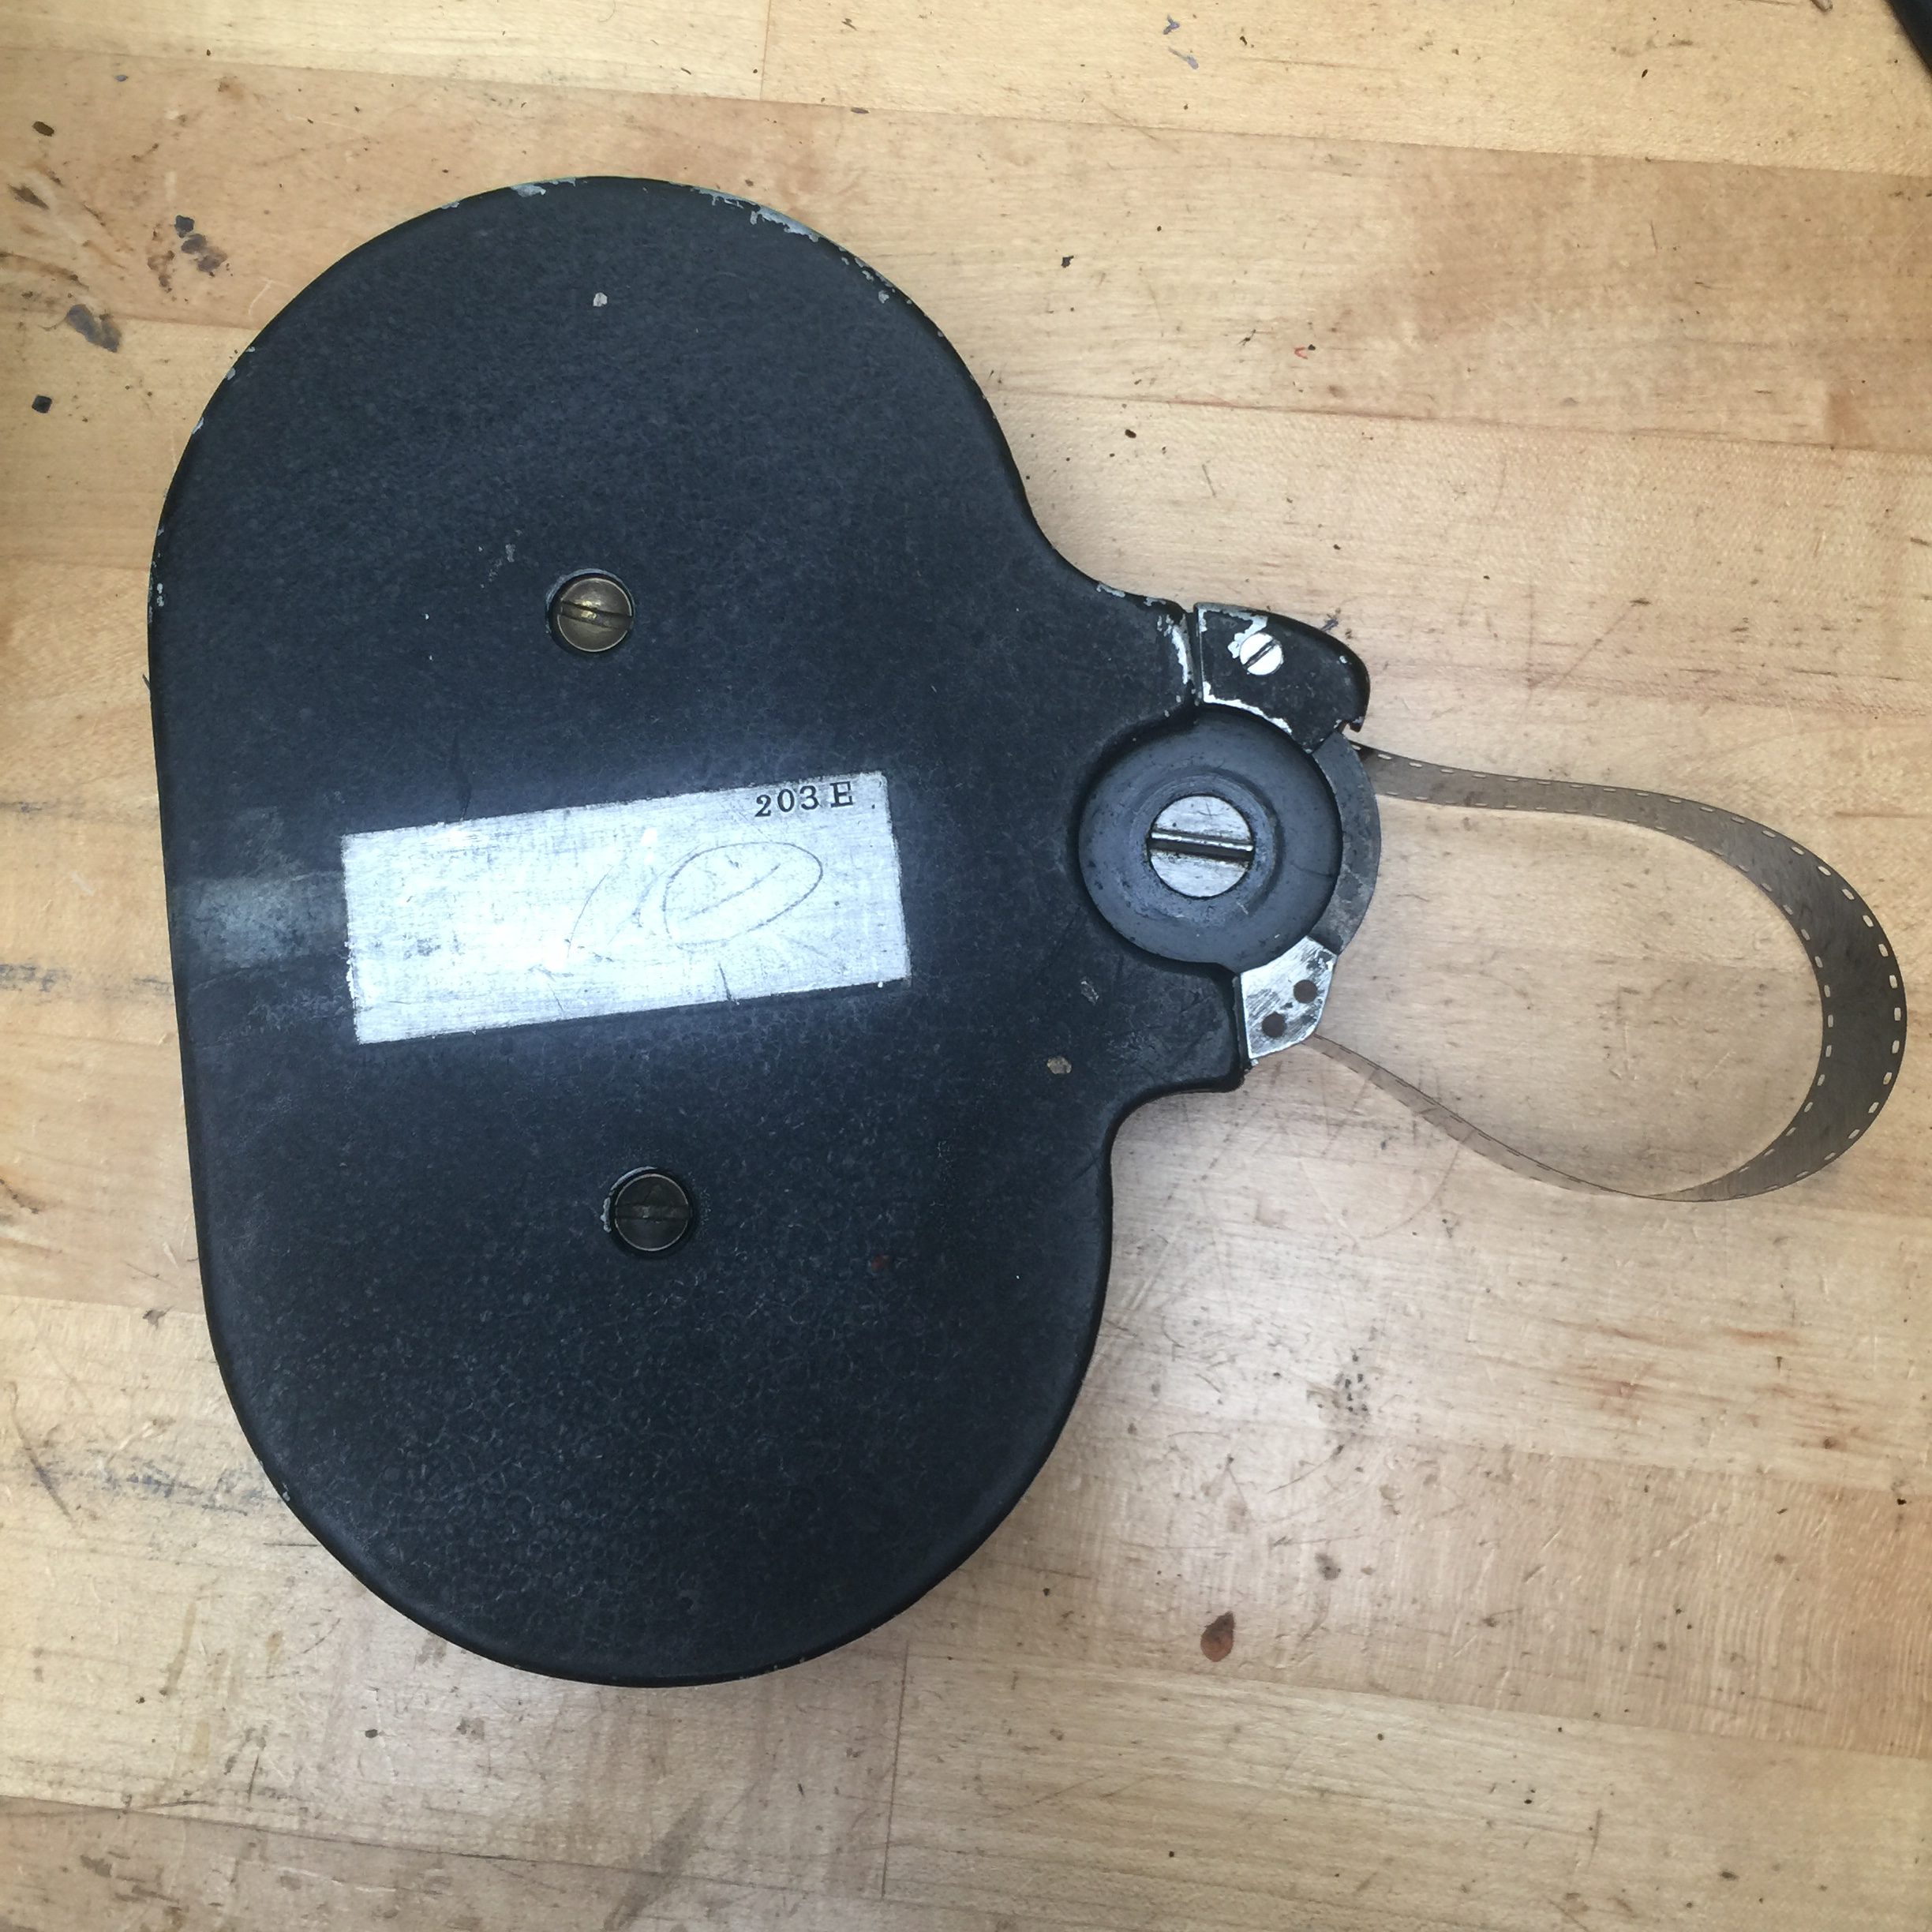
An Akeley 200′ magazine. serial #203E to be exact. Akeley cameras are rare and expensive, but apparently their magazines are not. This one I got off Ebay for pretty cheap. That’s just a dummy bit of film. Central roller has sprockets on it, so loop size is set in the bag.
The only conventional element in appearance was the magazine, which held 200′ and went inside the round drum of the body. The loop was pre-set in the mag, so re-loading was fairly quick in the field, provided you had a spare loaded mag waiting. It truly was a camera for quick moving action, as it’s designer intended.The camera quickly became adopted in Hollywood a specialty camera filming action sequences. It would be called for specifically in shooting scripts (“Akeley shot”), and directors would say “Get me an Akeley man!” if he had an action sequence that needed filming. It also was quite popular with documentarians. Robert Flaharty used two Akeley cameras when filming “Nanook of the North.” Akleleys were also used in “Wings” as well as chariot sequences of “Ben Hur” to name a few examples.
Not only did the Akeley camera make art, sometimes it was the subject of art itself. The machining and build quality of the camera was such that Paul Strand, days after buying one, took stills of various parts of the camera and those photos are now considered art and are part of the Metropolitan Museum of Art collection. An original print of one of the interior photos can go for $40,000.
The Field Museum, as of this writing, has an exhibit of the camera itself on display which runs until March 2019.
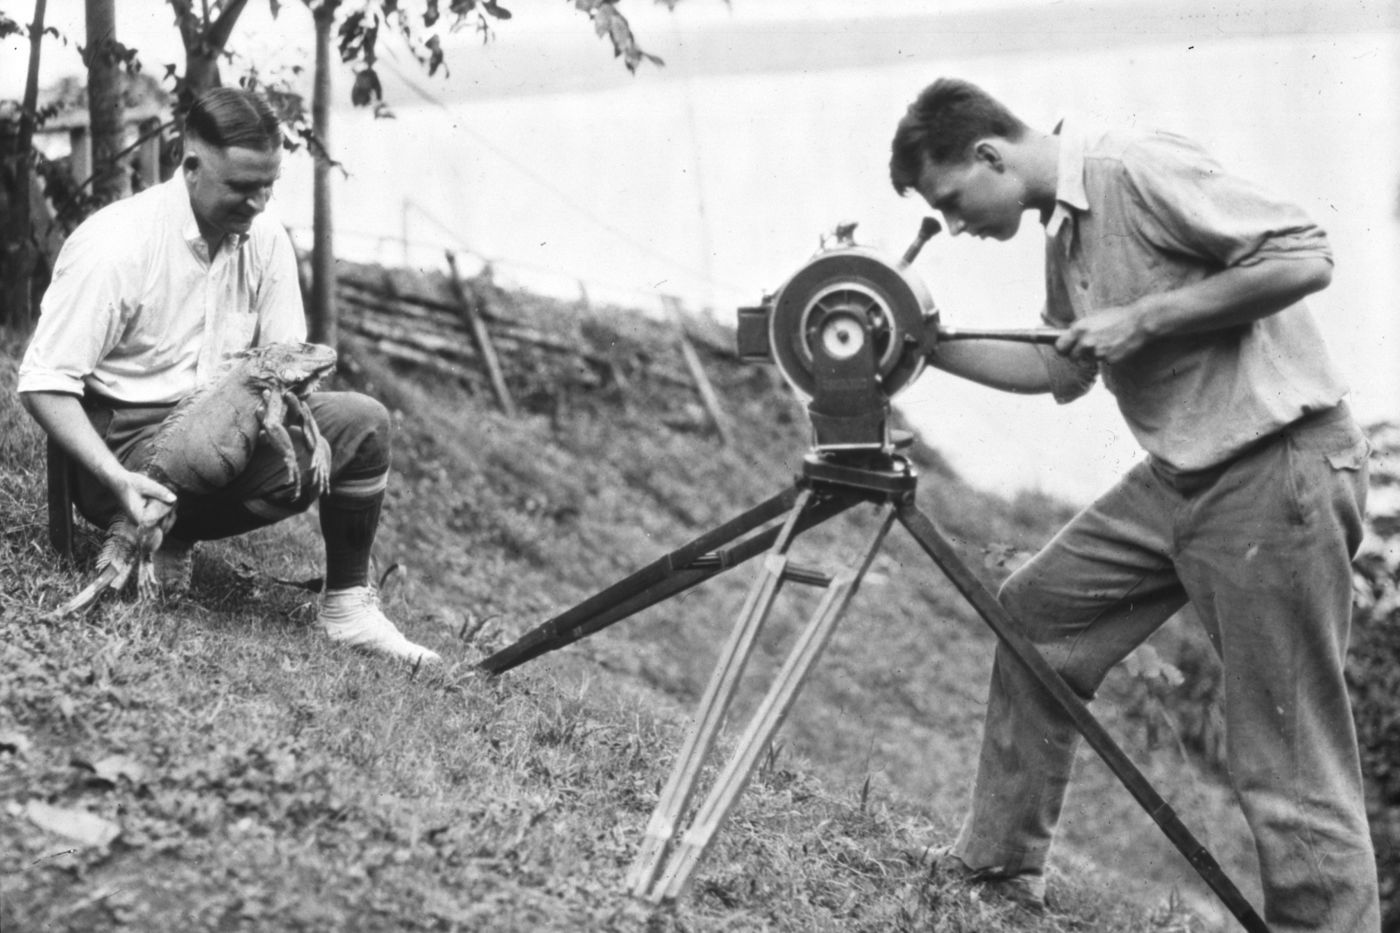
The Akeley camera was used during the Field Museum’s 1928–29 Crane Pacific expedition. Note the ball level put to good use on uneven terrain. Also integrated head/camera design. Photo from the Field Museum.
If you want detailed info on the operation of an Akeley Pancake camera, check out Sam Dodge’s detailed walk through an Akeley.
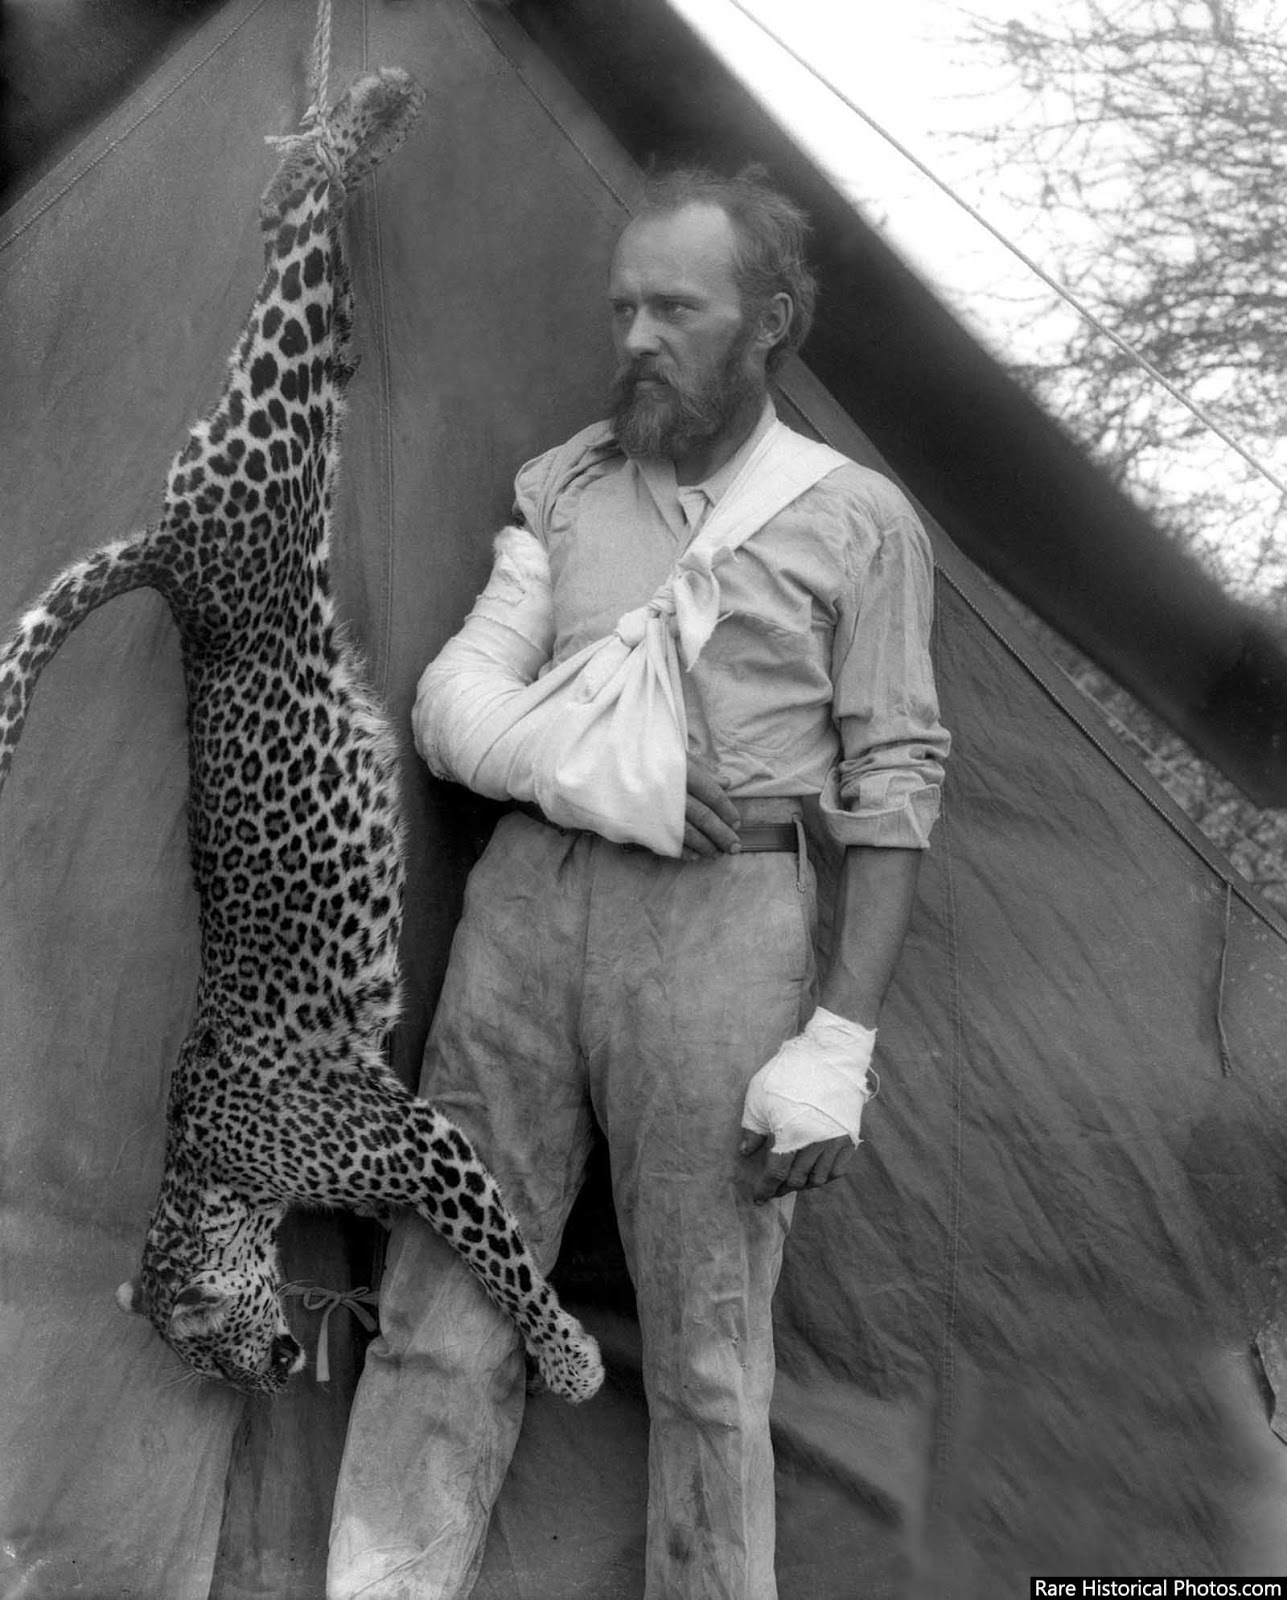
Carl Akeley’s life seems fantastical at times. He was the “Father of Modern Taxidermy.” He invented the most innovative action camera of its time, and even invented spray-able concrete after seeing the facade of one of the museums he worked for falling in disrepair. He killed a leopard with his bare hands (partially because he was a bad shot) survived getting trampled and left for dead by an elephant, hung out with Teddy Roosevelt in Africa, and his wife left him because of a monkey. He was a big game hunter, but also a conservationist. He is responsible for the biggest gorilla preserve in Africa. He even wrote a book about some of his adventures:“In Brightest Africa.” He died in 1926 in the Democractic Republic of Congo of a hemorrhagic fever, shortly after taking George Eastman on safari.
1919: The WIlart (Whew!) The Wilart Instrument Company in New Rochelle NY started making what was essentially a clone of the Pathé Professional, except the body was made of metal, like the Bell and Howell 2709, and pretty much all subsequent camera models after the 2709. Pictures of the interior film transport/ gate area are indistinguishable from the Pathe.
Presumably the metal body eliminated any static discharge, but about this time film stocks were adding an anti-static backing as an option which also alleviated this problem. But this backing was too dense to use the peephole option for framing through the back of the film between takes as many early cameras relied on (like Pathe & Wilart.)
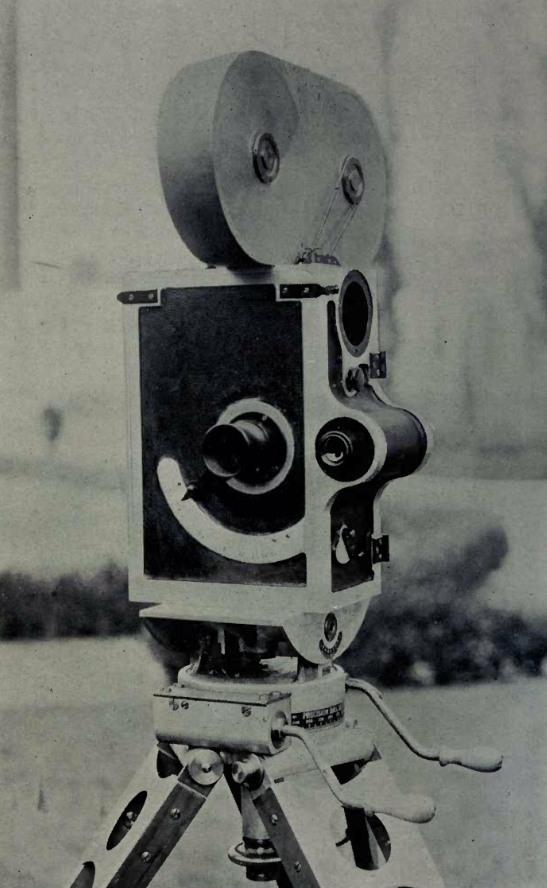
An early version of Wilart. Note the parallax viewfinder integrated with the body. Also either iris indicator in on front panel.
It is unclear to me if The Wilart Instrument Company licensed the Pathé design or just out-and-out stole it. Curiously, they did not reference the similarities to the Pathé in advertising, which suggests they perhaps didn’t ask permission to copy it.
In any case, The Wilart hoped to cash in on an affordable American made camera in the post-war boom. Granted, it’s technology was from 1903-1907 (evolution of the Pathe features) and as such, was 15 years old, but was an affordable, proven design, but now in metal. It ended up a camera used more in industrials and 2nd tier productions, as by this point the cutting-edge cameras in Hollywood were the Bell and Howell 2709 and the Akeley Pancake camera. Nevertheless Wilart Instrument Company seemed to achieve success, working on further designs and even planning a large film storage facility in Baltimore. But by 1926 the “talkies” came and the need for additional hand cranked cameras fell through the floor. The Wilart company seems not to have weathered this storm and disappeared without a trace.
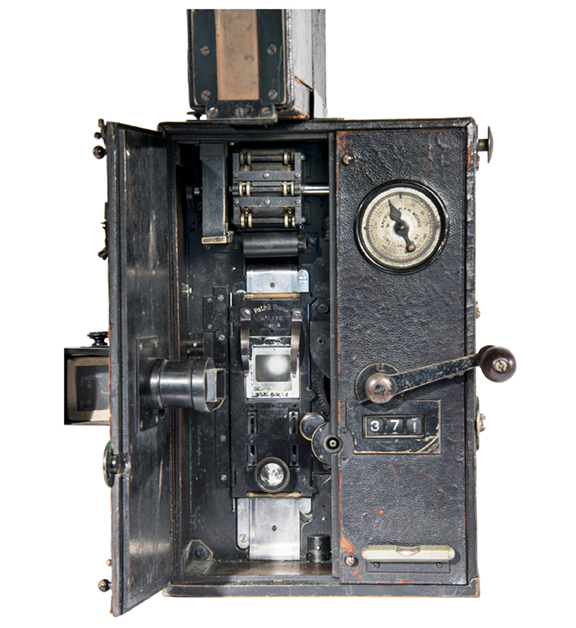
Pathé insides. Notice a similarity? Photo: ASC collection
Ok! that was the evolution of how we got to the Wilart. Next let’s learn how to load it.
“How to Load and Operate a Wilart Part 2: Loading” coming shortly……

