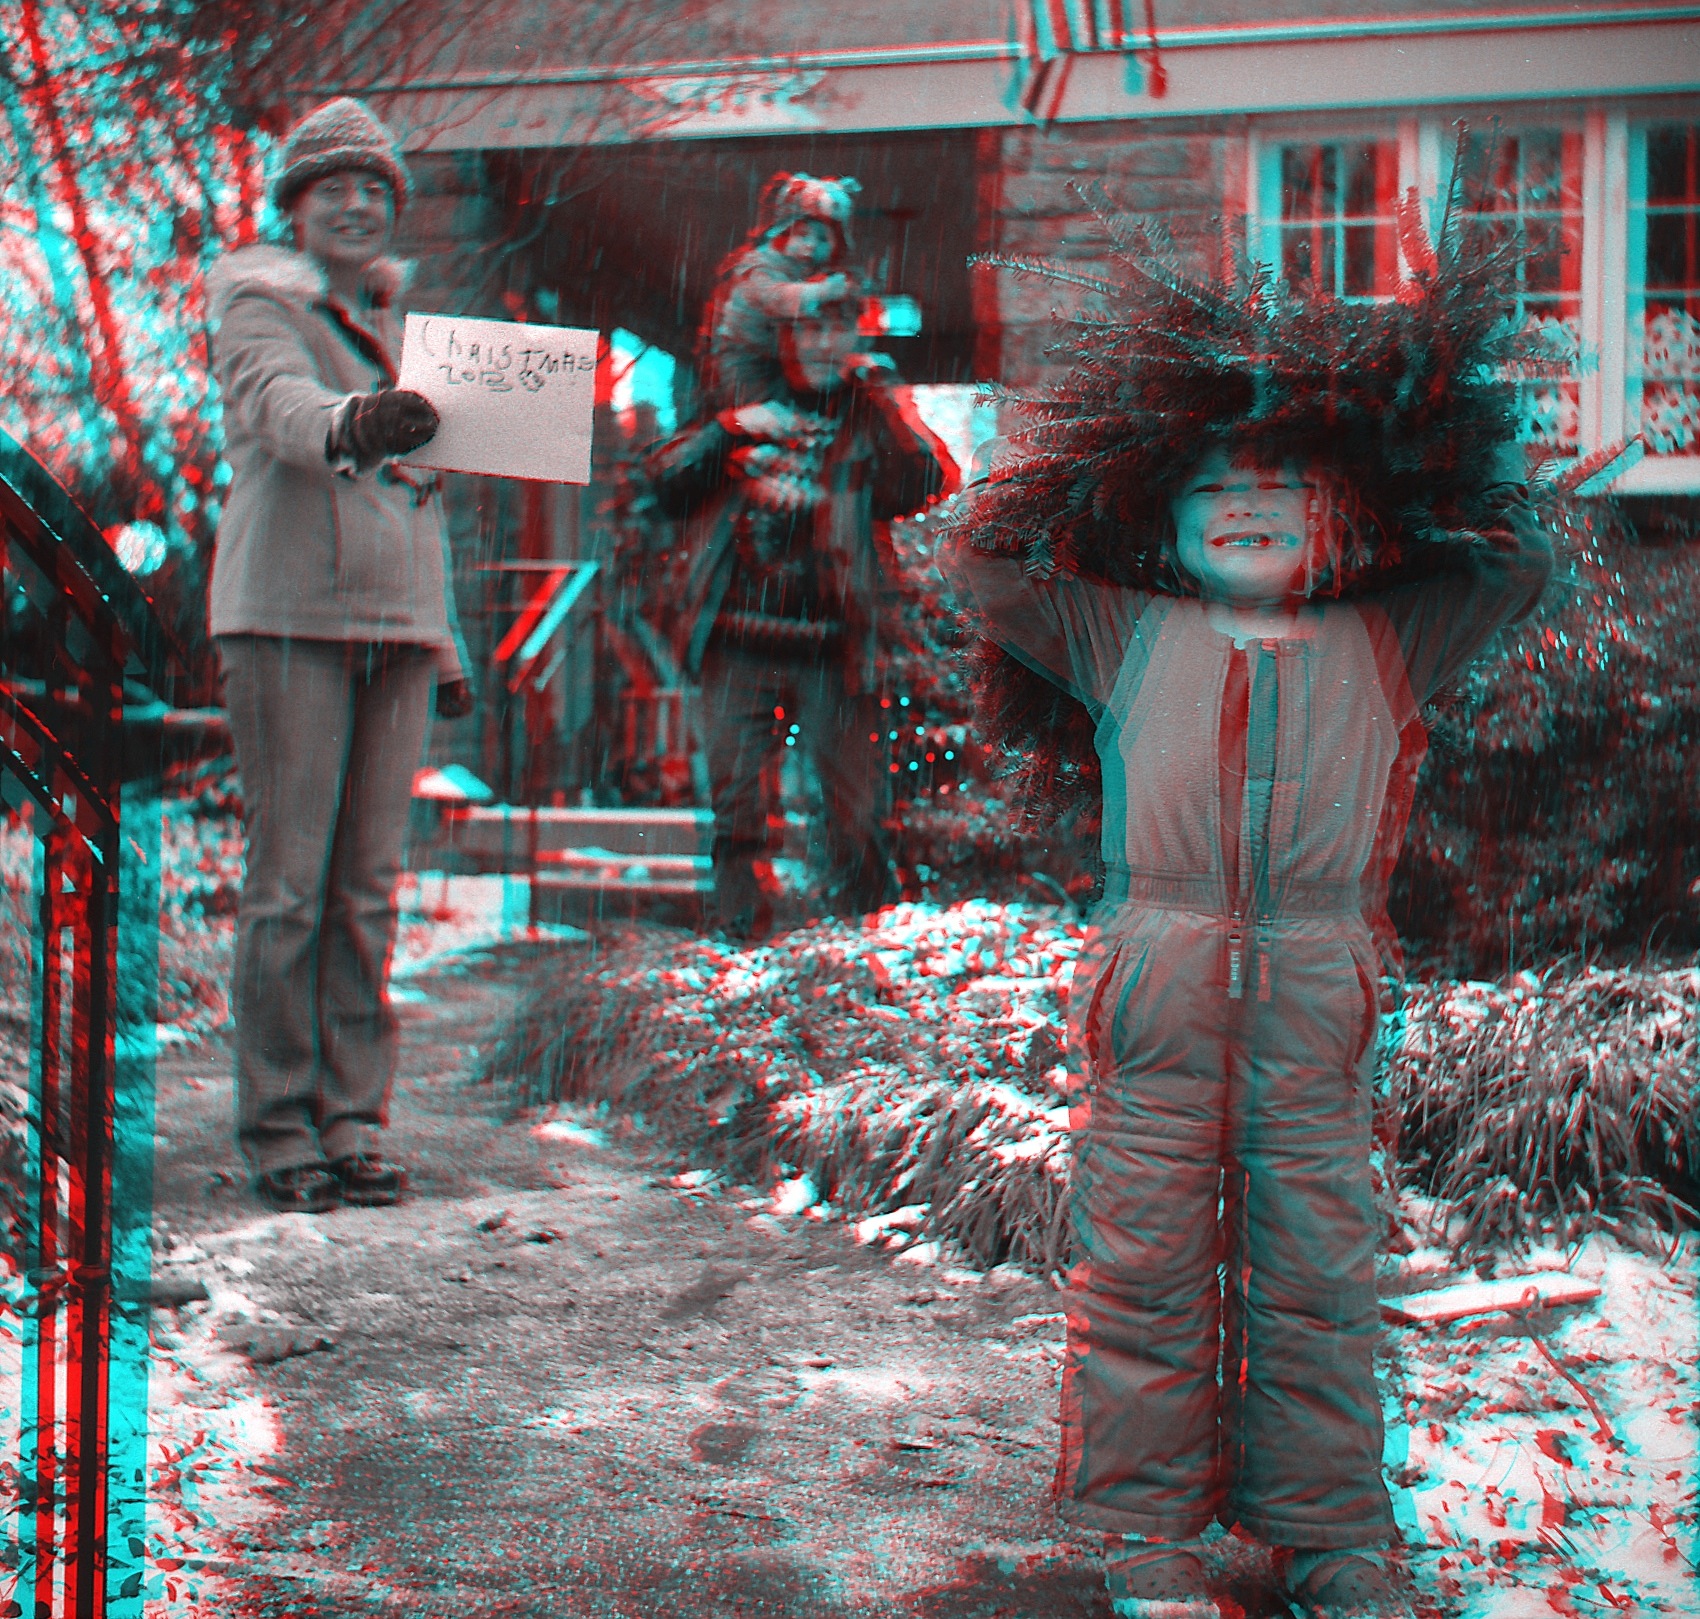
My 2013 Christmas card photo. Anaglyph glasses required
My current obsession with vintage stereo cameras really caught fire because of my 2013 Christmas card. I had been interested in stereo cameras, dabbling here and there over the years. I also like to tinker and do things with my hands. I had done a staged, lit Christmas card in 2012 but it was a very stressful experience, what with nice clothes, and herding cats and my then pregnant wife and kid. Everyone was grumpy for hours afterward. I vowed 2013 would be different. Something like an impromptu snap of the family. But how could I still have something special about it? Due to my interest of old stereo cameras, I had two Russian “Sputnik” medium format stereo cameras. One working, and one not, mainly for parts. But I hadn’t used them in a few years. I also had some expired black and white medium format film in a drawer. Snow was forecast later that week, which is unusual in mid December in the DC area. I hatched a plan. I would take a picture in stereo of us outside the house either during the snowfall or shortly after that. I planned to make the Christmas card an anaglyph stereo print, which means the print would require viewing with “those funny glasses.” There are several ways to view a stereo image but they all boil down to one thing- sending the left image to the left eye and the right image to the right eye, while also blocking the image from the non-corresponding eye. Anaglyph is the cheapest way to do it, as I could get cheap paper glasses for .20¢ each, and include them with the picture in the envelope. The anaglyph system uses color to control the images to the eyes. The most common use today is red/ cyan anaglyph. You have the red filter over your left eye and cyan (the opposite of red) on the right eye. Take the left image, destined for the left eye, and tint it so there is no cyan in it, which will make it appear red. The red filter will do nothing to the red image. The cyan filter on the right eye, however will only let cyan images show up and as there is no cyan in the left image, it will appear a black frame to the right eye. Do the opposite to the right image, and you have an anaglyph print! It will look like a poorly registered color print without glasses, but 3D with the glasses. Anaglyph is well suited for black and white images as it is using color to encode the stereo information. You can do it with color images, but color reproduction may suffer a little. I mainly used black and white as a) it is better for anaglyph and b) it was what I had on hand, and what with film loosing ground as a format, I suspect medium format is only available via the mail now, and this whole idea hit me inside of a standard weather forecast, so ordering fresh stock for this seemed unlikely to work out.
I had never made an anaglyph before, so there was a reasonable possibility this would not work out. But the deadline and a goal became an incentive to teach myself how to do it. And if it didn’t work out, I always would have one half of the stereo pair, which could serve as a “normal” picture for the Christmas card. I had the camera and film, but I would need more elements. I found a source for cheap glasses and ordered them. I investigated getting Photoshop Elements, which shockingly, I didn’t already own. I decided not to buy it until I got a good “negative report” from my shoot, i.e. A picture actually worth printing either due to poor content or a malfunction on the camera or it’s operator (me!).
The day came, the snow arrived on schedule, I loaded the film and got the camera on a tripod and waited for the best moment. We went shopping for a Christmas tree up the street. We struck out on getting a tree but we did get a wreath. When we got home, since everyone was already dressed for outside, and it was still snowing, I got everyone to stand in the front yard, trying to compose a shot that both was well framed as well as using the 3D space. This meant my daughter, who is shorter than my wife, became the foreground element. My wife, the mid ground. And I, with my son on my shoulders would be the background. There were two wrinkles to this. Although I had 400asa Tri-X black and white film, it was pretty overcast due to the snow, and I ended shooting at around f5.6 which meant we couldn’t hold focus over the whole depth of the scene. I picked a point a little past my daughter as the focus point and hoped for the best. The second problem to be overcome was the twitchy-ness of the Sputnik camera I was using. The viewing system takes some getting used to, the film advance system is about as analog as you can get, and worst of all, the shutter trigger and timer were very hit or miss. First you have to cock the shutter. Then pull the timer lever down. Then push the shutter release. Doesn’t sound too bad. Except the shutter timer lever doesn’t wait till you hit the shutter to start running. A common problem in Sputnik cameras. So you pull the timer down and let go and it immediately starts running. If you don’t cock the shutter before you start it AND trip the shutter after you have started the timer it won’t take a picture. If you hit the shutter release in the wrong order you take a picture without benefit of the timer. Only good thing is you can always re-set the timer after you have triggered the shutter as the shutter won’t fire until the timer runs out. So, cock shutter, start timer, trigger shutter, pull timer back to max, then run as fast as you can in wet snow with your 11 month old on your shoulders to be in the rear most part of the frame. Fortunately all that went wrong was early firing of the shutter. The roll had 12 exposures, which meant 6 stereo pairs. Two were ruined by early triggering of the shutter, two were screwed up by me mis-understanding the manual advance, one was ok, and one was good. A word on the advance. It is completely manual, to the point that the only way you know you have advanced it properly is a little window on the back of the camera that lets you look at the paper backing of the film that has a number on it when you are in the right position. If you overshoot, oh well, just have to advance to the next number. Also since you are shooting stereo, you have to advance it by two, at least when you don’t overshoot your target number. So if your first exposure is “1” you have to advance it to “3” to be ready for another stereo pair.

this is what happens when the shutter timer fires prematurely.
I scanned the negative, brought the shots into Photoshop Elements, aligned them and applied the anaglyph red/cyan to the images. when aligning them you want the verticals to align perfectly, but the horizontal offset determines where in the 3D space the images lie. I put my daughter slightly forward of the frame ,so she appeared to “pop” out slightly, and the rest of us fell deeper in the frame. It turned out quite well, overall. based on this experience, and others, my tips for medium format stereo photography are as follows:
I love medium format- the negative is 4-5 time bigger than comparable 35mm (purpose built 35mm stereo cameras use a non-standard 35mm frame that is a bit smaller than the standard 35mm frame.) This means any dirt on the negative when you scan it in can be fixed relatively easily and is minor compared to 35mm. Also, even with old Russian triplet lenses, the image has a lot of detail, and detail is important for good stereo photography. The downside to medium format is on any given field of view you end up using a higher millimeter lens. The Sputniks use a 75mm lens (ok, a pair of them!) which in 35mm format would be telephoto. Not so in medium format. the side effect is a shallower depth of field. Normally, that is a desired thing for portrait photography. but in stereo photography you want as much in focus as possible. So ideally you want to be shooting more like an f11-22 if you can do it. But you also don’t want a lot of noise, so you don’t want too fast a film stock. so this generally means outdoor photography, or be willing to deal with some out of focus elements.
Also, here are some tips for framing. these Russian lenses are not really very good on the edges. so don’t put anything too important on the edge. generally put your most important element more towards the center. This is also true for stereo photography. Due to reasons I won’t get into too much here, anything you want to have pop forward of the frame should not break the edges of the frame. there is a little flexibility with the bottom edge, but top and sides, if anything breaks that edge, it is going to have to play deeper than what I will call zero plane, which is where the frame sits in the 3D space. this is another reason to put anything in the foreground in the center, or near the center.
Also, contrary to what you might think, you don’t necessarily want to try and use your entire potential depth. just because you are outside, doesn’t mean I should see anything out to infinity. This is especially true if you want a fairly close foreground element. too much range in depth can put background elements so far out of alignment that the eyes have trouble fusing them back into a 3D image. You get ghosting and loss of 3D effect. In this picture the house and plants define background at maybe 30-40 feet maximum, which is good, since my daughter is maybe 7 feet from the camera.
All in all, it came out quite well. I got my daughter to pop out a bit, and the edge violation of her legs is not bad enough to break the 3D effect, and I staged my wife, me and my son on different planes of depth, and had the background defined by the house, limiting my total depth budget. I used as much of the fame as possible although if I had to do it over again I would not have framed in the gate. It is more forward than my daughter, and is on the edge, so there is a bit of edge violation and retinal rivalry there. Some of that can be fixed with tricks called “floating window” but I didn’t have the time or the inclination to learn how to actually create one in time for the card. See for yourself if you have glasses and see if the gate gives you some problems. your brain doesn’t know where to put it in the scene. Only my daughter is in sharp focus, which technically not so desirable in 3D, but it didn’t bother me as much as I thought it might. Also, I had no choice in the matter as I was limited by my film stock and ambient light as to what f stop to shoot at. All in all, not a bad “snap” for a family photo, and my first serious attempt at actually executing a staged stereo photo.